Digital Ocean Custom Images Not Uploading No Errors
Lessons Learned: Digital Ocean for Python three
This entry is part of an ongoing series. I spend a lot of fourth dimension trying out new technologies. More often than non, considering of a recommendation like: "You should try [insert technology here], it's super like shooting fish in a barrel!".
This turns out to rarely be the case, so every time I invest hours into trying to go something to piece of work, I'll publish my solution, and any tips and tricks I learned forth the fashion.
Digital Bounding main is a cloud based server provider, with very reasonable plans that permit you to shift computation off your estimator and into the cloud, saving you fourth dimension and keeping your calculator fresh!
I initially followed Tomi Mester's tutorial to get DO set up, but quickly realised I wanted to do more (although I highly recommend the rest of the series, Data Scientific discipline from the Command Line). This turned out to be a picayune tricky, and then here's my walkthrough.
1. The Signup
Head over to Digital Bounding main and create an account, using either Paypal or a Credit Bill of fare (if you use the link above you'll become some gratuitous credit and so will I. If you don't want to do that, just click hither).
If yous're a student, you tin can also get $50 in credit from the Github Student Pack (which I besides highly recommend). Digital Bounding main initially wouldn't have my code when I signed up, merely I submitted a support ticket and they credited it within a few hours.
2. Your Start Droplet
Droplets are server space which is specifically reserved for y'all. You're just e'er charged when you have a droplet (regardless of whether it's on or off), but creating and destroying them is easy, so don't worry about being charged when you lot're not actively using it.

In the top right-hand corner of your DO dashboard (or in the heart if you don't already have any droplets), expect for the Create Droplet push.
Clicking information technology takes you to the setup page. The showtime option is prototype:
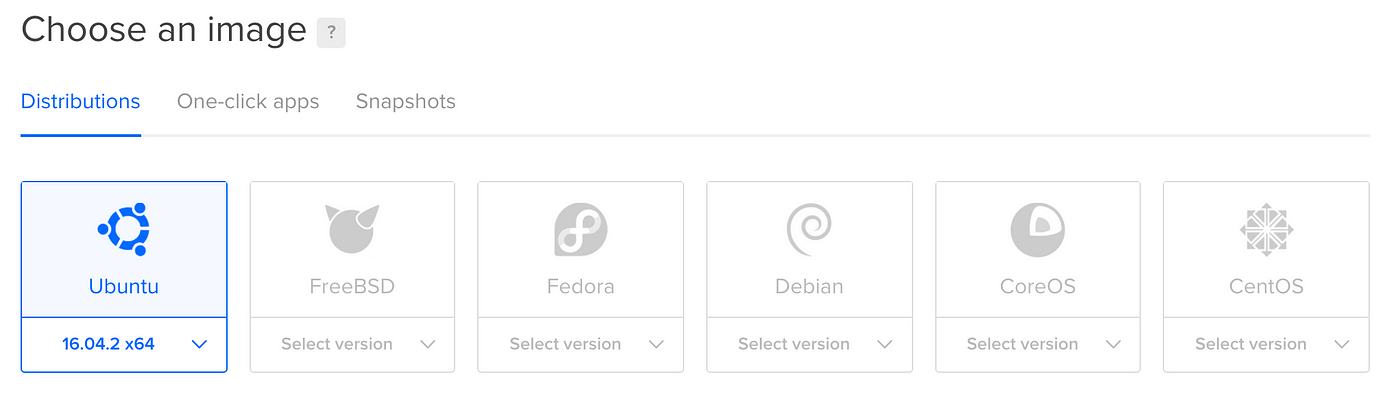
You lot won't have a Snapshots choice (more than on this after), but the default choice (Ubuntu) is what we desire, so you don't have to do annihilation here.
The second choice is pricing plans:
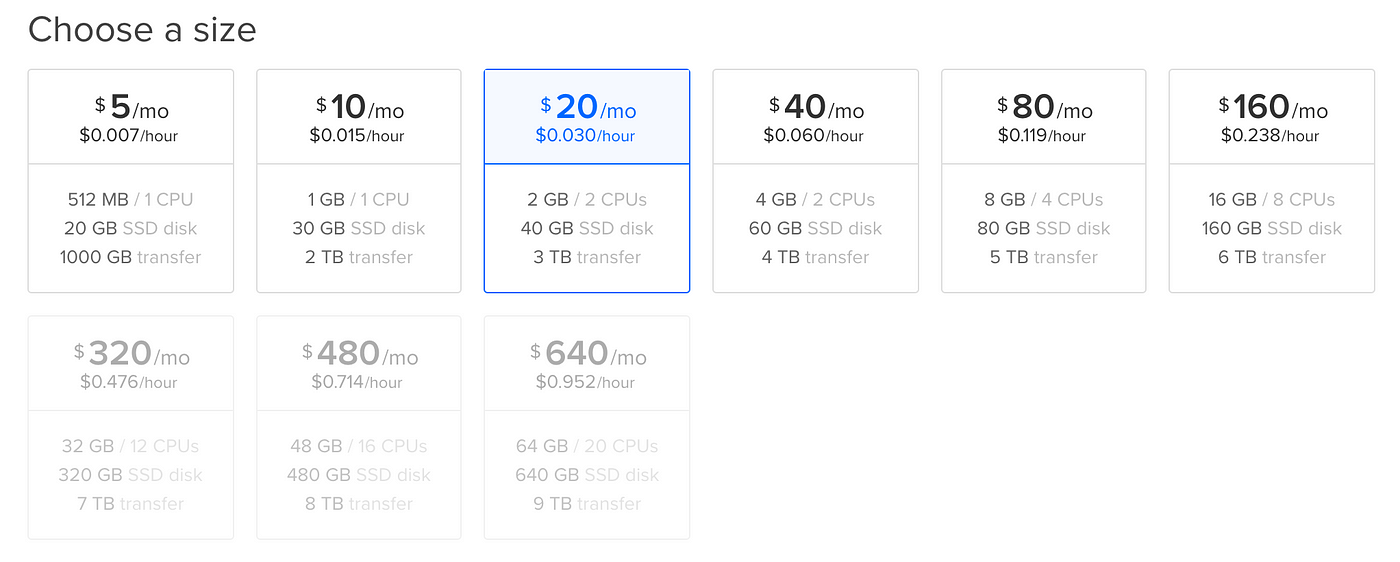
Here you can see what you're getting, and how much information technology costs. Y'all're charged per hour that the droplet exists, and so unless you lot're non deleting it when you lot're done, your cost will be a lot lower than the per-month costs quoted.
Which 1 you pick depends on a few things:
- How big are the files you'll be loading into retentiveness? (pandas dataframes for instance). The commencement line under the price is how much memory / how many CPUs the droplet has.
- Tin can your process be distributed? (think
sklearn njobs= -1). If information technology can, multiple CPUs will speed up processing. Likewise, if you have a lot of data, splitting in half and running the jobs at the aforementioned fourth dimension volition salve time, but is only possible on aerosol with more than i CPU. - How big are the data files you'll be uploading? This is the second line, the corporeality of storage available.
- The last line represents the amount of data transfer (upload + download) that is immune. Unless you lot're doing something really crazy, 1TB is more than than enough.
I recommend the $five/month pick to commencement. It's pretty piece of cake to upgrade if you're hitting a wall.
The third step is Add Block Storage. You don't demand this initially.
The forth is choosing a data centre:
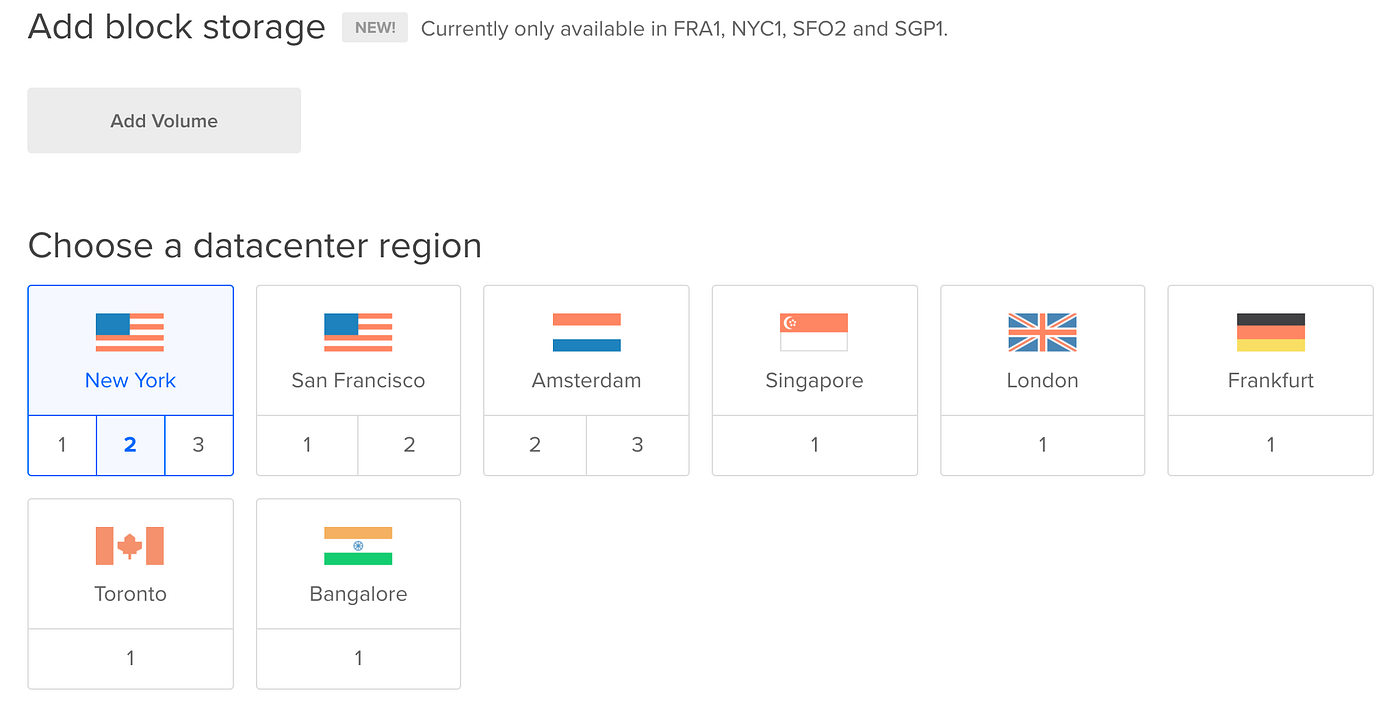
I'm in Ireland, and so I chose London. Choose whichever is closest to you.
The final pace is to enable monitoring (more on this later) and requite your droplet a really useful name!
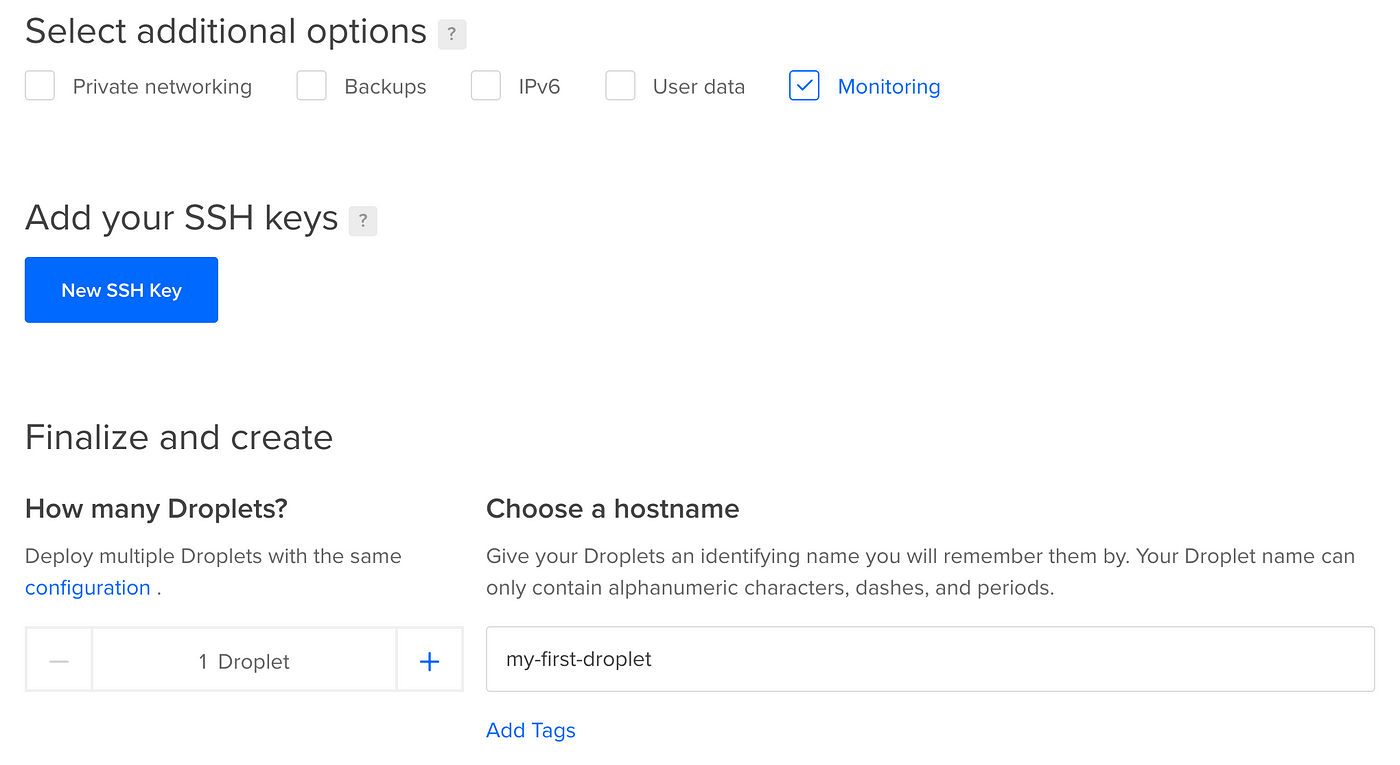
Then hit create droplet, and later on a infinitesimal or so, y'all'll exist all set!
iii. Initial Setup and Snapshots
When you're washed, yous'll get an email from Digital Bounding main with an IP address, username and password. Copy the IP accost, fire up your command line and enter:
ssh root@[IP Address] If this hangs and nix happens, you can endeavor:
ping [IP Address] and see if y'all take a connection. If non, you're probably being blocked by an external firewall (your work or university). This happened to me, and there'south non a lot you can do:
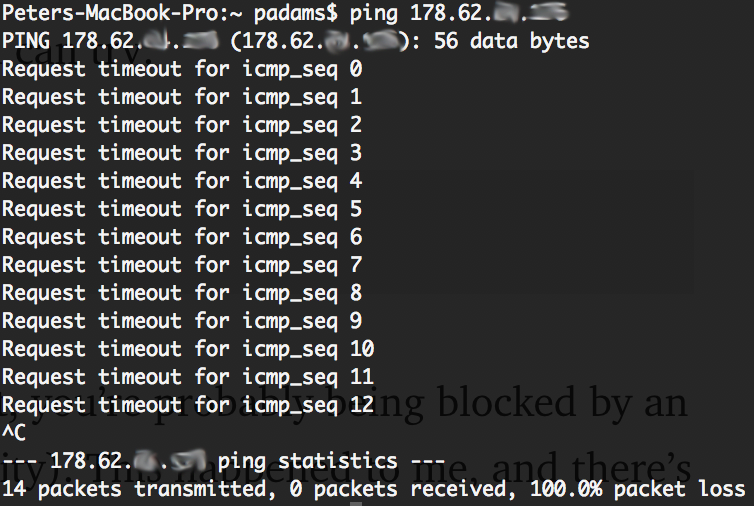
If you practise go a response from ssh root@[IP Address] , there volition be a agglomeration of text asking yous if you lot desire to proceed. Write yeah and printing enter.
Y'all'll then be asked to enter the password. Copy and paste that in from the email and hit enter. Yous'll and so need to change the root password. Make this pretty secure as you won't exist logging into root that often, but if someone else does they can totally wreck your droplet.
Adjacent, yous want to create a user:
adduser [username] where [username] is anything you want.
You'll have to create a password for this user, and it'll ask for a agglomeration of personal data. Enter this if y'all like, or skip information technology (printing enter), it doesn't matter.
Next, give your new account permissions to do stuff on the server
          usermod -aG sudo [username]
gpasswd -a [username] sudo
This gives yourself the ability to make changes without having to exist logged into root.
Finally, change the time zone:
sudo dpkg-reconfigure tzdata and select your current city.
Nice! We're all set upward on root. Now nosotros can leave and bank check out your user account.
exit ssh [username]@[IP Address]
In one case you've logged in, the commencement footstep is to configure your fustigate profile to make your life easier.
nano .profile If you haven't used Nano before, information technology's a simple text editor. Use arrow keys to move, Ctrl+k to cut a line, Ctrl+u to paste a line, Ctrl+o to save, Ctrl-x to go out.
You tin can add aliases hither (shortcuts) to brand life easier. I use Python iii and Pip 3, and so I by and large avoid defoliation by setting:
          alias python="python3"
alias pip="pip3"
I as well hate typing nano ~/.contour when I desire to alter or cheque my fustigate profile, so I alias that as well:
          alias obp="nano ~/.contour"
allonym sbp="source ~/.profile"
You tin can too add together whatsoever other aliases here. Save it with Ctrl+o and exit with Ctrl-ten .
To implement these changes, you need to source the profile:
source .profile (Every bit a side note, you can't utilise new alias shortcuts earlier you've sourced them, then merely inbound sbp won't piece of work even so, just will afterwards you've sourced information technology the long way one time).
apt-get is a bit similar Pip for the command line, and should exist updated earlier we go any farther.
sudo apt-get update Python 3 is already installed, just Pip isn't, so let's go alee and become and update that:
          sudo apt-get install python3-pip
pip install -upgrade pip
Now yous can pip install all your regular Python packages! Well, you can in a 2d. For some reason, Matplotlib and a few other packages have issues with Ubuntu, but you lot tin can solve these by running:
          sudo apt-get install libfreetype6-dev libxft-dev
sudo apt-get install python-setuptools
Sugariness, now you tin can go basics with pip3 install . If yous have a requirements.txt file which you employ for all your installations, you can run that at present.
Finally, AG is a great search tool for the command line which doesn't come up as standard, then y'all can install that besides if you'd like:
sudo apt install silversearcher-ag Perfect, you're all prepare! Now, this was quite a lot of work, and it would suck to have to do this each time. That's where Digital Ocean snapshots come in!
This is a way to 'save-equally' your current droplet, so that when you lot create a new droplet adjacent fourth dimension, y'all tin just load that image and y'all'll beginning exactly where you left off! Perfect.
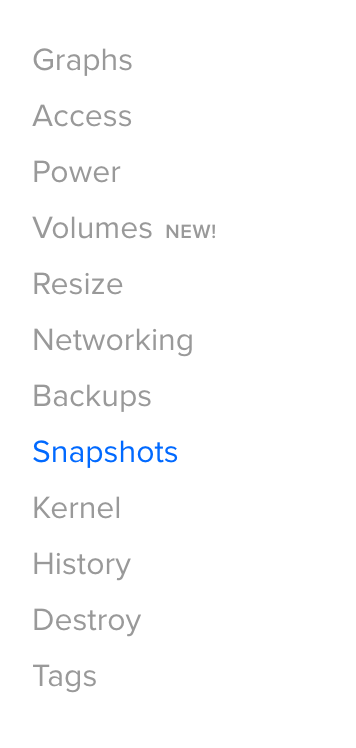
Powerdown your droplet using sudo poweroff and caput over to the Snapshots carte du jour-detail on your Digital Ocean droplet page:
Snapshots aren't free, they cost $0.05/Gb/month. My snapshot taken with Pandas, Numpy, Matplotlib and a few other packages install was 1.85Gb, so that's about $1.11 per yr. Not bad because information technology'll save you ten minutes each fourth dimension you prepare a droplet!
Every bit your droplet is already powered downwardly, striking the 'Have Live Snapshot' button and Digital Ocean will do the residuum.
A side annotation here, it doesn't appear you tin can read a snapshot into a cheaper droplet pricing scheme. Merely something to keep in heed.
If y'all e'er want to upgrade your pricing scheme, head to the Resize menu item. Over again, you lot can't downgrade here and if you want to, you'll need to create a droplet from scratch and repeat the above steps.

To plow your droplet back on, caput to Digital Ocean and in the top-right hand corner of the droplet page at that place'southward an on/off toggle. Plow information technology dorsum on and you lot're ready to upload data.
4. Uploading Data via SFTP
At present, if you accept the data on your personal computer and desire to ship it upwardly to the cloud, you'll need to do so via SFTP (Secure File Transfer Protocol). This is fairly easy, admitting it non lightening fast.
To start, make an SFTP connection:
sftp [username]@[IP Address] Now, you lot can use the normal command line functions similar cd ,ls and pwd to move around the file arrangement on the server. However, for some reason, autocomplete (tab) doesn't piece of work on SFTP. For that reason, I suggest uploading all your files and code into the habitation directory, and the logging back in with ssh and moving stuff around using mv and autocomplete. Trust me, it'due south much easier.
That's on the server side, but how well-nigh moving around on your personal computer? The same commands work, merely you need to prefix them with an boosted 50 , that is lcd , lls and lpwd . Manoeuvre your fashion to the directory where the files are held on your local, then upload them to the server using:
put [localFile] or for a whole directory:
put -r [localDirectory] This isn't fast, for my 1.5Gb data files it took about 20 minutes each. Annoying, simply there's not much you tin can practice. You lot tin upload in parallel, but this means opening up a new command line tab and logging in with SFTP again, plus both connections slow down by half, and so the total time is the aforementioned :(
You can meet how much of yous storage you've used past running:
df -h For future reference, downloading files from the server is as simple as:
get [remoteFile] or
get -r [remoteDirectory] Now, once your data files are up on the server, you can upload your python scripts too. Make sure that if your local directory configuration is different to the remote, to change whatsoever file locations in the code.
Deleting files from the server is likewise slightly different to locally, as rm -rf directory doesn't piece of work. Y'all demand to rm filename to delete a file, or empty a directory and then rmdir directory to delete a folder.
This is enough to become yous started, but if you lot're interested in more advanced options, there's a practiced tutorial here.
I thoroughly recommend testing all your lawmaking locally (I employ PyCharm, which is not bad and has a free student license too) on modest subsets of the information, then when it'due south working, SFTP'ing the code to the server and running it once. Troubleshooting over remote connection tin can exist abrasive.
5. Running Computations
At present, you're all gear up up to run some computations. Log back in with ssh , organise all your files, and run whatsoever code with python filename.py as you would on your local computer.
If yous get a Killed response when yous try and run some code, information technology means you don't have enough memory to complete the job. You accept two options. Either powerdown and upgrade your pricing program, or create a Swapfile (more below).
Printing error logs volition give you some more information on what has gone wrong:
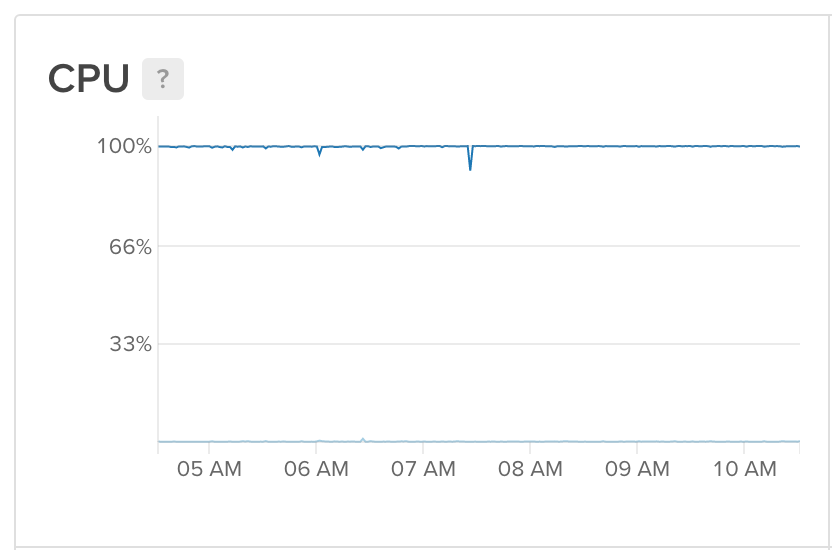
sudo cat /var/log/kern.log You tin can monitor task progress on the Digital Ocean dashboard that shows yous some nice graphs of usage:
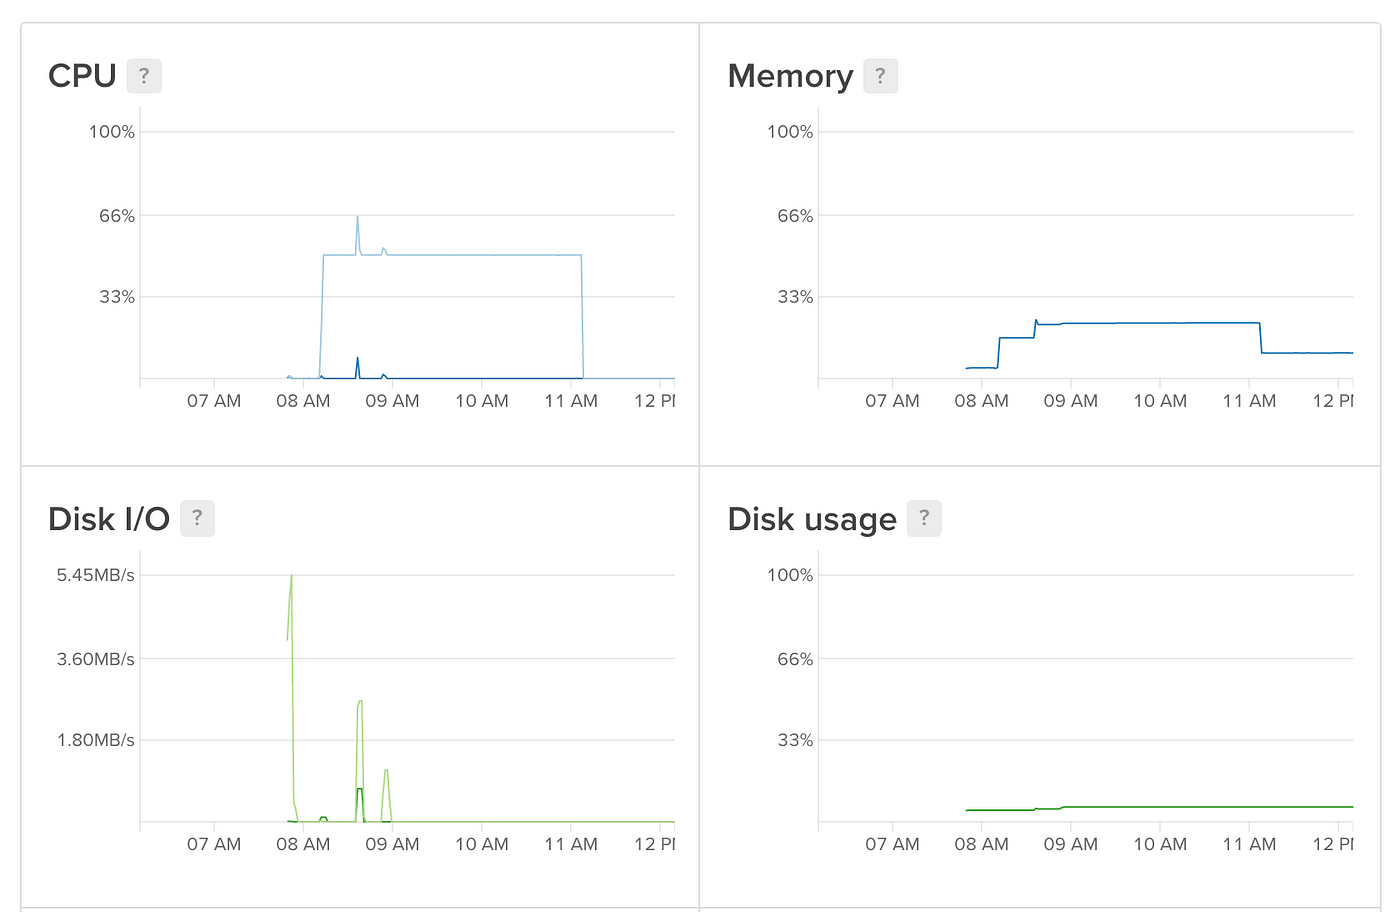
You can even set up alerts to become an email when a metric drops below a certain level, similar CPU, which can be used to allow you lot know when a job is done! Click on 'Create Alert Policy' at the acme of the Graphs page to set up something similar this upwards.

Once you're done with your processing, you can use SFTP to get your files from the cloud, and so destroy the droplet so you don't go along to exist charged for it!
Now for a word of alarm; be careful when writing to file.
I wasted a lot of time running a pandas utilize role, and then using df.to_csv('filename') to save the results. If in that location are any issues with the server (which there may well be, more than below), you'll lose everything before it'south written to file.
My workaround was to loop over the unabridged data frame and print the effect line past line:
                      for            row            in            range(len(df.index)):
            col_value = df.9[row,:].values[ii]
            ind = df.alphabetize[row]
            with open("./data_file.csv", "a") as file:
            file.write(ind + ',' + function(col_value) + '\northward')
This actually wrote my information to csv , then I could but merge the data frames on their alphabetize values to line things up.
result = pd.concat([df, new_data], axis=1, join_axes=[df.index]) Not every bit pretty as apply , simply sometimes when dealing with data of this size, it'southward better to trade-off some performance to ensure you're actually getting the data you want!
6. Improving Performance
1 of the best things about Practise is that you can have upwardly to 20 CPUs in your droplet, which can all run processing in parallel. This is much faster than but processing all your data on 1 CPU.
Yous should know how many CPUs your program has, but if non, you tin can apply the following code to cheque:
true cat /proc/cpuinfo | grep processor | wc -fifty I have 2, so this means I can run 2 processes simultaneously. From what I can meet, this doesn't slow either process, and so y'all tin can effectively work twice as fast if yous dissever your task in half. The best way to do this is to split up whatever data yous have in one-half, so run the same script on each. In Python, I'd add the post-obit code after importing your information with pandas.
          import sys          number_of_cores = 2
length_of_df = len(df.index)
stream = sys.argv[1]          if stream == i:
            start = 0
            end = length_of_df // number_of_cores
else:
            start = length_of_df // number_of_cores
            end = -1          data_to_process = df.iloc[start:finish,:]          output_filename = "output_data_" + str(sys.argv[i]) + ".csv
Then from the command line y'all can run
python script.py one which will procedure the commencement half of the data, and
python script.py 2 which will process the second. Combine the two data files at the end using
cat output_data_2.csv >> output_data_1.csv 7. Troubleshooting
My biggest headache was getting my scripts to run to completion. For some reason (that I never figured out), the server would simply stop running my processing, and so I'd have to restart information technology manually. My usage graph looked like this:
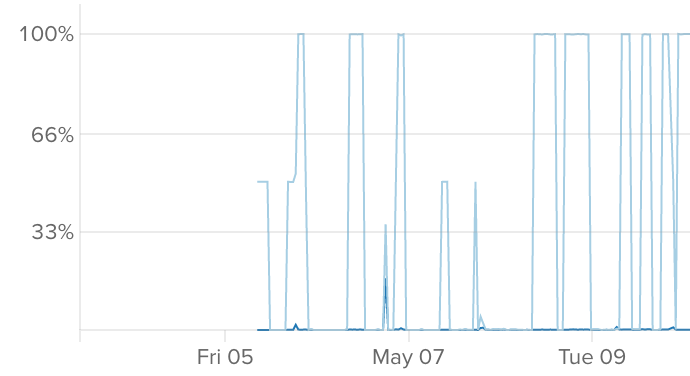
Really not platonic, especially every bit my higher firewall blocked my connection, so I had to wait until I got dwelling to restart things.
The first part of my solution was to effigy out the re-start point in the for loop, so I wouldn't exist re-doing computation. I used the subprocess module and then I could run command line functions from within a python script:
          import subprocess          stream = int(sys.argv[1])          if stream == 1:
            cease = 3387532
            information = "./information.csv"                      a = subprocess.Popen(['wc', '-l', information], stdout=subprocess.PIPE)
            wc = int(a.communicate()[0].rstrip().decode().split(' ')[0])                      starting time = 0 + wc
My total number of rows in my file was 6,775,065, and I had two CPUs, so like above, I set up my terminate alphabetize to half of the file size. The subprocess.Popen returns the results of a command line function, in this case, wc -l ./data.csv , or checking the number of rows in the output data. stout=subprocess.Piping makes the output easier to work with. The adjacent line retrieves the actual line count of the output data, and so start is gear up to accordingly.
This meant whenever things crashed I could simply run:
          python script.py 1;
python script.py 2;
on unlike terminal screens and both halves of my data would restart when the appropriate place. A good result!
All the same, this didn't do anything to stop my server crashing, nor restart processing automatically after it did. Some enquiry led me to crontabs, which allow functions to exist evaluated at specific time periods. Y'all can see current crontabs with:
crontab -50 At that place shouldn't exist annihilation there, and then you lot can go ahead and create 1 using:
crontab -due east The start time, y'all'll be asked to select a text editor, Nano is the easiest, simply this can be changed later by running'select-editor'
I won't become into as well much detail, but the last line of the file looks like this:
# 1000 h dom mon dow command This stands for minute, hr, day-of-month, month, mean solar day-of-week and command. This allows you lot to set a command to be run at a specific interval. A few examples:
*/10 * * * * eval "python3 script.py" Runs a script every 10 minutes.
10 * * * * eval "python3 script.py" Runs a script at ten minutes past the hr every hour.
10 5 * * 3 eval "python3 script.py" Runs a script at 10 past 5 every Wednesday.
You become the idea. For me, I wanted to bank check every 10 minutes if my server had crashed, and if so, restart it. So my crontabs were:
          */10 * * * * eval "python3 sys_test_1.py"
*/ten * * * * eval "python3 sys_test_2.py"
(I had to have two considering of the difficulties of running python scripts on separate CPUs from the aforementioned file, this was merely easier). There'south more of a detailed explanation of crontabs here if you're interested.
So my file sys_test_1.py looked something like this:
          information = "./data.csv"          a = subprocess.Popen(['wc', '-l', data], stdout=subprocess.Pipage)
wc_1 = int(a.communicate()[0].rstrip().decode().split(' ')[0])          if wc_1 > 3387530:
            exit()
else:
            fourth dimension.sleep(fifteen)                      b = subprocess.Popen(['wc', '-fifty', information], stdout=subprocess.Pipe)
            wc_2 = int(b.communicate()[0].rstrip().decode().split(' ')[0])                      if wc_1 == wc_2:
            subprocess.call(["python3", "run_comp.py", "one"])
So I bank check the number of lines in my file, and if information technology's over some threshold (ie close to the end of the required computation), exit. Otherwise, look 15 seconds and check the file length over again. If they're the same, it implies no computation is ongoing, so it calls the computation script from the command line.
Notice I've specifically chosen 'python3' , even though I have an alias fix so alias python="python3" in my bash profile. Calling python scripts with subprocess appears to ignore aliases, so keep that in mind.
So with this running every ten minutes, I had a manner to bank check if anything was wrong, and if it was, restart processing automatically. Since I stock-still this, my server has run non-finish, with any crashes defenseless quickly and processing restarted.
Perfect!
And at that place you accept it! You now know how to create, setup, upload information, and run scripts on a deject server! Big Information, hither y'all come!
There'southward more of an caption on swapfiles beneath, just that's optional reading…
If you liked this post, please click the ❤ push button to let your followers know, or allow me know your thoughts beneath or on Twitter @padams02.
Swapfiles
Swapfiles are a way to give your droplet extra memory by partitioning part of the difficult bulldoze. That way, when the system runs out of memory, it can save some data to disc and think information technology later. This will let you lot exercise more with cheaper plans, but is considerably slower. Proceed in heed that it'due south probably better just to upgrade your programme.
To create a swapfile, run
sudo fallocate -l 4G /swapfile where 4G represents the size of the file, ie 4 gb. This is the size that yous desire the retention to take. Too big and you lot won't accept room for your other files, too minor and you'll still run out of memory. 4 gb should be fine.
You need to then requite write permissions to that directory, create the swapfile, and actuate it:
          sudo chmod 600 /swapfile
sudo mkswap /swapfile
sudo swapon /swapfile
Open upwards the fstab file:
sudo nano /etc/fstab and add to lesser of the file:
/swapfile none bandy sw 0 0 There's a parameter called swappiness (awesome name) that sets how much and how oft memory is swapped to disc. The higher the value, the more oft it swaps. Nosotros don't desire information technology to bandy that much, so we want to alter the default value (60%) to ten%.
sudo sysctl vm.swappiness=10 To ready this as default, open:
sudo nano /etc/sysctl.conf and add to lesser of the file:
vm.swappiness=10 murraypritioneatch.blogspot.com
Source: https://towardsdatascience.com/lessons-learned-digital-ocean-for-python-3-e2442db4246f
0 Response to "Digital Ocean Custom Images Not Uploading No Errors"
Post a Comment